


The great WordPress world is saturated by a variety of free and premium themes, but finding a perfect theme for business needs is no easy task. It’s rare when you are 100% satisfied with the default theme design, elements kit, and customization options. More often you are up to change, delete or add something, which is beyond the given functionality of the chosen theme. Moreover, there is always a risk to damage an existing website by adding new updates and modifying the code. Fortunately, WordPress proposes a good solution to this issue. And this is a child theme.
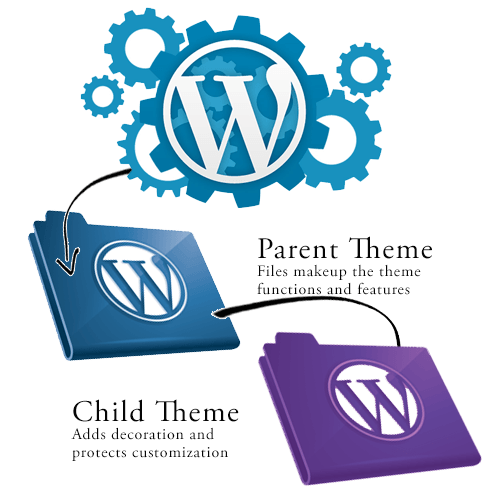
WordPress child themes are as simple as a bit of custom CSS code. Child themes open new horizons to the WordPress website. They are able to save existing parent theme and website functionality while changing or adding some content. The main principle of child themes is a perfect combination of the parent-child relationship. WordPress themes, both premium, and free templates are parent themes. And all child themes adopt their characteristics from the parent themes. That is, the child theme will get the full set of functions from the parent theme.
If updates of parent themes are released, the child theme doesn’t take them. Only the content of the parent theme can change, but the settings of the child theme remain the same. Thus, you can save changes and enjoy your own updates only in the child theme. Let’s sort out why to use a child theme.
What is child theme?
When talking about child themes, we first have to talk about parent themes. A theme only becomes a parent theme when someone builds a child theme for it. Until then, it is just a theme, such as the ones you find in the WordPress directory. Every theme that includes all of the files required in order to be considered complete can be a parent theme.
Yet, while any such theme can be a parent theme, some are better suited to this purpose than others. For example, frameworks are specifically made to be customized by child themes.
What is a child theme, then? Well, from the WordPress back end, a child theme doesn’t behave any differently. You can find and activate it under “Appearance” → “Themes,” just like you would with any other theme.
The big difference is that a child theme depends completely on its parent in order to work. Without its parent theme present, it will not do a thing and cannot even be activated.
That’s because a child theme isn’t a standalone entity, but instead modifies or adds to the files of an existing theme. It uses everything present in the parent theme and changes only those parts that you want to be different.
This allows you to alter styles, functions, layout, templates and more. In fact, you can customize the parent theme beyond recognition. However, without it being present, none of it will work.
Create a child theme in WordPress
All right, now that we know how awesome child themes are and what they can do for us, let’s go over how to create one step by step. For our example, we will use Seosight theme for WordPress.
Side note: The steps below can be performed directly on your server via an FTP client. However, I recommend that you first set up everything locally, then zip your child theme folder and install it like a normal theme via the “Theme” menu. This will make the whole thing much easier.
CREATE A FOLDER IN wp-content/themes
As mentioned, a child theme needs three things: its own folder, a style sheet, and a functions.php file. We will start with the folder.
Like any theme, child themes are located in wp-content/themes of the WordPress installation. So, navigate there now and create a new folder for your child theme.
A best practice is to give your theme’s folder the same name as the parent theme and append it with -child. Because we are using the Seosight theme, we will call our folder seosight-child.

You are free to use any name you want to; just make sure not to include any spaces because that might cause errors.
CREATE A STYLE SHEET
Now that we have our folder, we will need a style sheet. In case you are not aware, a style sheet contains the code that determines the design of a website. Themes can have multiple style sheets, but we will be content with one for the moment.
Making a style sheet is easy: Simply create a new text file and call it style.css. Done! However, in order for it to actually work, we will have to paste the following code, the so-called “style sheet header,” right at the beginning of the file (code courtesy of the WordPress Codex):
/*
Theme Name: Seosight
Theme URI: http://example.com/seosight-child/
description: >-
  Seosight Child Theme
Author: Crumina
Author URI: http://example.com
Template: seosight
Version: 1.0.0
License: GNU General Public License v2 or later
License URI: http://www.gnu.org/licenses/gpl-2.0.html
Tags: light, dark, two-columns, right-sidebar, responsive-layout, accessibility-ready
Text Domain: seosight-child
*/
Here is what each line means:
- Theme name. This is the name that will show up for your theme in the WordPress back end.
- Theme URI. This points to the website or demonstration page of the theme at hand. This or the author’s URI must be present in order for the theme to be accepted into the WordPress directory.
- Description. This description of your theme will show up in the theme menu when you click on “Theme Details.”
- Author. This is the author’s name — that’s you, in this case.
- Author URI. You can put your website’s address here if you want.
- Template. This part is crucial. Here goes the name of the parent theme, meaning its folder name. Be aware that it is case-sensitive, and if you don’t put in the right information, you will receive an error message, so double-check!
- Version. This displays the version of your child theme. Usually, you would start with 1.0.
- License. This is the license of your child theme. WordPress themes in the directory are usually released under a GPL license; you should stick with the same license as your parent theme.
- License URI. This is the address where your theme’s license is explained. Again, stick with what your parent theme says.
- Tags. The tags help others find your theme in the WordPress directory. Thus, if you include some, make sure they are relevant.
- Text domain. This part is used for internationalization and to make themes translatable. This should fit the “slug” of your theme.
If you feel a bit overwhelmed (already?), you might be happy to know that not all of this information is actually required. In fact, all you really need is the theme name and template.
The rest is important only if you plan to publish your theme, which I am not. For this reason, my child theme’s header looks like what’s shown below. Feel free to copy it and make your own adjustments.
/*
 Theme Name:   Seosight Child Theme
 description: >-
   A child theme of the Seosight WordPress theme
 Author:       Crumina
 Template:     seosight
 Version:      1.0.0
*/
ACTIVATE CHILD THEME
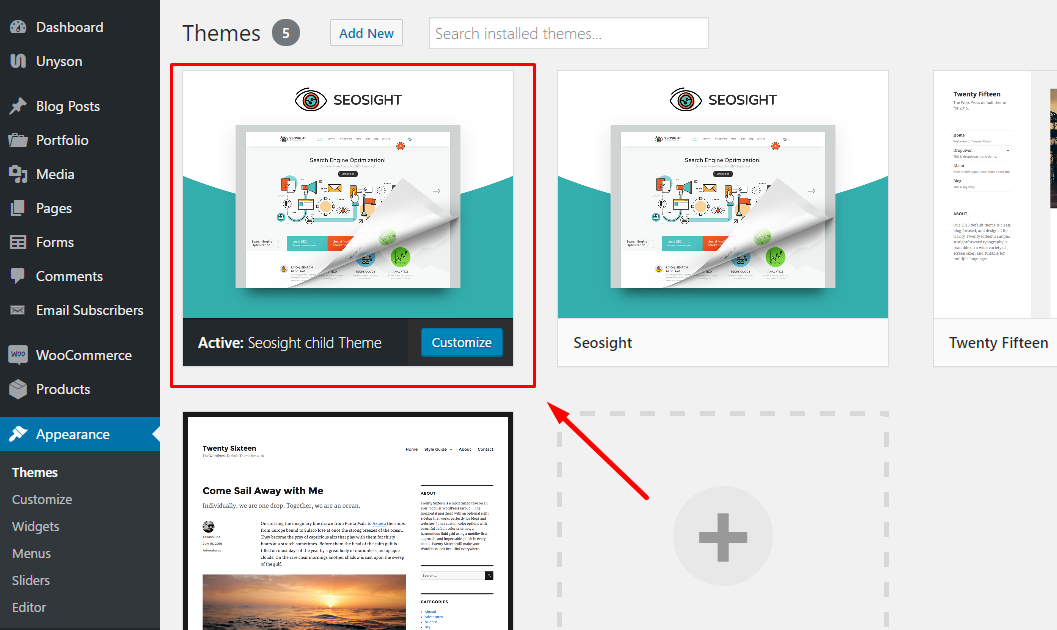
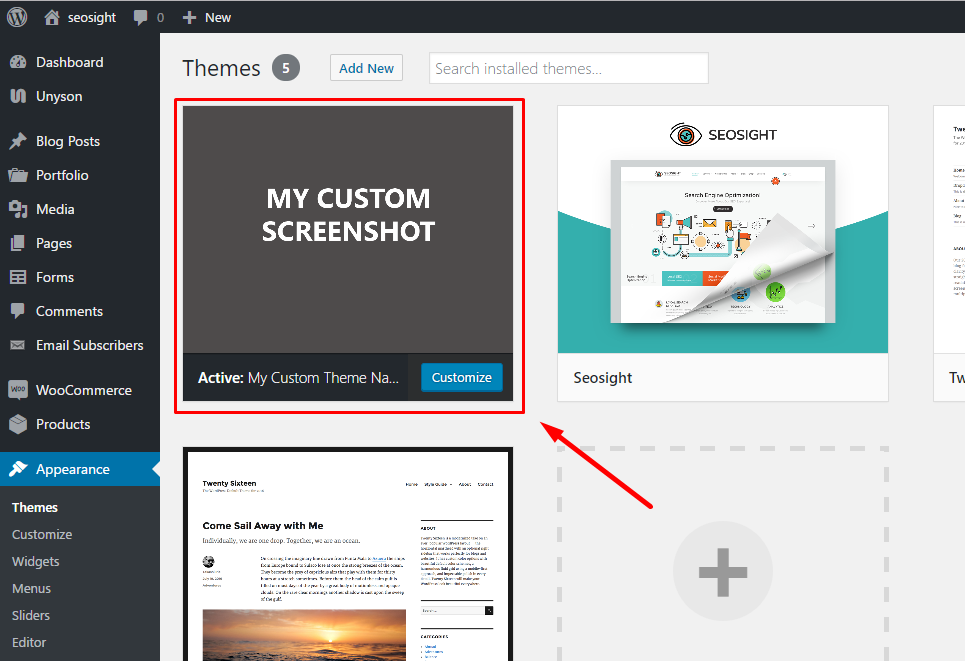
Once your folder and style sheet are there, go to “Appearance” → “Themes” in the WordPress backend and find your child theme there. When you click on “Theme Details”, you will see the contents of the style sheet header. That’s what that info is for.
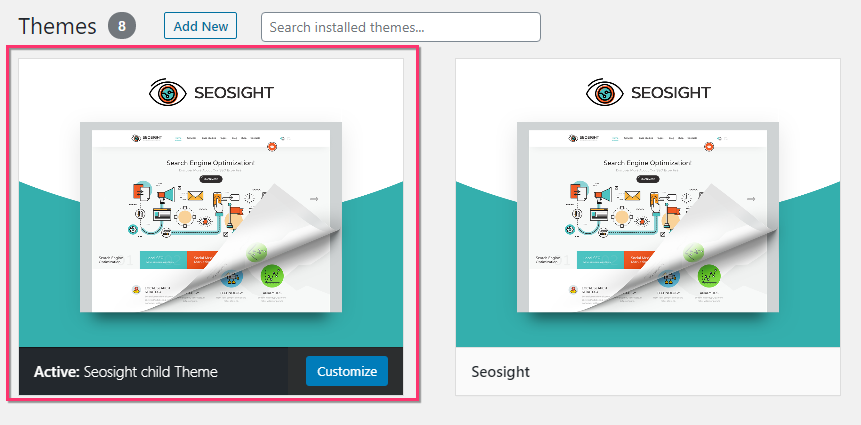
All right, now click on the button that says “Activate.” Good job! Your theme is now activated.
CREATE FUNCTIONS.PHP
Next up is the functions.php file. You have probably heard of this file before, but let’s quickly go over what it is for.
The functions.php file allows you to change and add functionality and features to a WordPress website. It may contain both PHP and native WordPress functions. Plus, you are free to create your own functions.
In short, functions.php contains code that fundamentally changes how a website looks and behaves. Got it? Nice, I knew I could count on you.
Creating the file is as easy as creating a style sheet, if not more so. All you need is a text file named functions.php, and then paste in the following code:
<?php
//* Code goes here
Seriously, that’s it. Just add that opening php tag and you are good to go. Of course, you could get all fancy and write some information in the header (don’t forget to comment it out so that WordPress doesn’t try to execute it), but this will do for our purpose. Add it to your theme’s folder as well.
Now, let me say this: You don’t need functions.php. If you don’t plan to use PHP to modify your theme, then you can completely do without it. A style sheet and other files might be enough for you.
However, I wanted to include this part, first, so that you would know about this important file and, secondly, because of the next step.
INHERIT PARENT STYLES
So, you are probably aware that your website is still mostly text. It’s time to change that. How? I’ll show you.
To get here, you will need to inherit the information in your parent theme’s style sheet. There are two ways to do this.
One is via CSS and the @import rule. By copying the code below into your style.css file, you are telling your child theme to use the info contained in your parent theme’s style sheet to present your content.
@import url("../seosight/style.css");
Be aware, however, that this is the old way of inheriting parent styles and is no longer recommended. The reason for that is performance.
If you need to import several style sheets (which is not unheard of), then using @import will cause them to download consecutively. This can slow down the page’s loading time by several seconds (which, I probably don’t have to tell you, isn’t a good thing).
The second, recommended way to load the parent’s style sheet — and the reason why we created functions.php earlier — is to use wp_enqueue_style(). This WordPress function safely adds style sheet files to a WordPress theme.
In our case, the corresponding code looks a little something like this:
add_action( 'wp_enqueue_scripts', 'enqueue_parent_styles' );

function enqueue_parent_styles() {
   wp_enqueue_style( 'parent-style', get_template_directory_uri().'/style.css' );
}
Be sure to paste this at the beginning of your functions.php file, and save it (remember to upload the file if you are using an FTP connection).
EXTRA POINTS: ADD THEME IMAGE
If you want to get all fancy, you could add a theme image. This image will show up in the theme menu in WordPress.
All you need to do is create a PNG file, named “screenshot.png“, and place it in your theme’s folder (in our case, seosight-child). Make sure to put it in the root directory. Example: ../wp-content/themes/seosight-child/screenshot.png
The recommended size is 880 × 660 pixels, although it will be shown as 387 × 290. The larger dimensions ensure that the image will show up well on high-resolution screens.
Other image formats such as JPEG and GIF would also work, but PNG is recommended. You can do this now for extra props or wait until you are done customizing the theme, because the image is usually a screenshot of the theme’s design.
Which are the key differences between the child theme and the parent one?
Well, now let’s get to know the main differences between the parent and child theme:
- The child theme can`t function without the parent themes. First, it’s required to install and activate the parent theme.
- The child theme is created only for one parent theme. There is no possibility to create one child theme for several parent theme.
- Any modifications of the parent theme do not affect the child in any way.
One may ask: “Why should I use a child theme?” Our team strongly believes it`s better to go for the child theme and we give you a few valuable reasons for it.
Theme updates. If you modify the theme code and then the theme will get updates, all these modifications will be lost. It seems that`s an important reason to start using a child theme. Do you still need theme updates? Yes! For example: what if the theme update includes a security fix and in case of inability to update the theme, your WordPress website could become a potential target for hackers.
Easy to Extend. Great flexibility is one of the main advantages of a child theme. There is no need to write a lot of code. You can modify only those template files and functions that you need.
Benefits of using Child Theme
The existing concept of a child theme is great. We suggest using child themes with all premium themes, and Crumina Team includes child themes in the package with our premium theme.
The child themes have a lot of advantages:
- The child theme saves your settings. Using a child theme, you can make changes directly to the code, without fear of losing your settings when updating the theme.
- The child theme is the first step in learning how to write code for WordPress.
- A child theme can improve the overall workflow. Using only one theme, you can create sites with different levels of functionality and complexity for several customers.
Child theme components
The child theme is a continuation of the parent theme, adopting all the functions and features. There is the main structure of the child theme:
- Directory of the child theme: This is the root of the folder where the files of the child theme are located.
- File style.css: This file contains all the properties of the styles of your child theme.
- The functions.php file: Contains the definition of the functions that are called in your child theme.
You can add any number of template files, but the above files must be in each child theme.
The easy way to install a child theme
For example, our SEO theme functionally provides an opportunity to create a child theme in 3 steps.
- Install and activate the parent theme according to its documentation.
- Install and activate the child theme right after that. The child theme comes packaged with the parent one, so you will easily find it. In all Crumina themes, it is located in the ‘Child theme’ folder of the theme package.
- Customize installed child theme. Done!
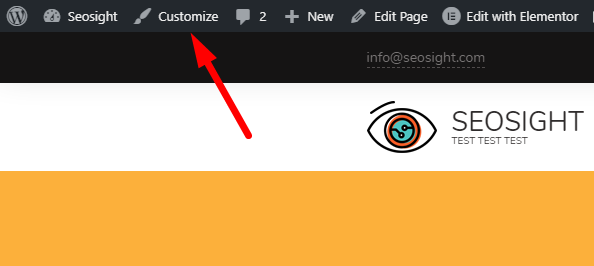
How to add my custom CSS to the child theme?
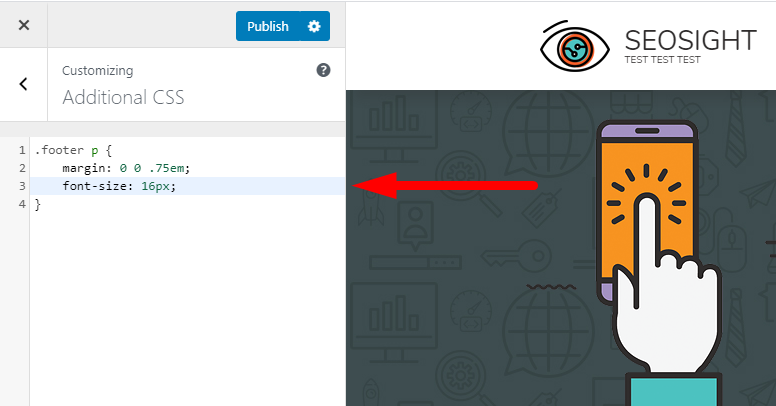
It’s available for the admin to add custom CSS to the child theme. One should strictly know how to do it correctly. Otherwise, it leads to damaging the child theme. Let’s see how it works in the Seosight theme. You can insert your custom CSS codes directly to the style.css file, which is located in the root folder of the child theme ../wp-content/themes/seosight-child/style.css by default. Another option is to insert custom CSS codes directly to the Customize > Additional CSS section from your WP admin dashboard. Both ways are correct. Choose the best for you.
Why you can’t rename the theme
When setting up a WordPress site, we often use pre-made WordPress themes. Very often we rename themes in order to represent them as our own products. But it often leads to unpredictable issues. In this article, we will tell you why you can’t rename themes.
Be it a premium theme, like Seosight, or a free one they are getting updated by their creators providing some new features or fixing bugs. It is very important to keep your theme up-to-date for maximal compatibility with WordPress and other plugins you might use with your theme.
Most modern themes come with an automated update function, that lets you get updates directly from your admin dashboard. If you renamed your theme, this function isn’t available for you anymore, because updates are linked to the particular theme name. Of course, you can download the latest theme package and upload the files via your FTP client (for example via the Filezilla program). But very often this option is ignored and you continue using an outdated theme for months until you realize it’s time to update. But it is already too late, because of two possible reasons:
- there is a great difference in the code between your current version and the latest update. Since you haven’t updated for a long time, the update may run not that perfect as you expected;
- you might have already edited the theme code with your custom changes, so an update will erase them for sure.
How to rename theme correctly
What if you still need to rename the theme? How to go about it and still get automated updates for the theme?
The only solution is to use a CHILD THEME. Each modern theme comes with a child theme. It fully inherits parent theme functionality, it serves for all possible code modifications and it doesn’t require updates. A child theme can be renamed!
If you are going to rename your theme, it is recommended to install the child theme from the start of your work. Follow the next steps:
- Install and activate the parent theme according to its documentation.
- Install and activate the child theme right after that. The child theme comes packaged with the parent one, so you will easily find it. In all Crumina themes, it is located in the ‘Child theme’ folder of the theme package. Logical, isn’t it?
NOTE: In more recent themes by Crumina, the child theme comes up to be active upon installation of the parent theme by default.
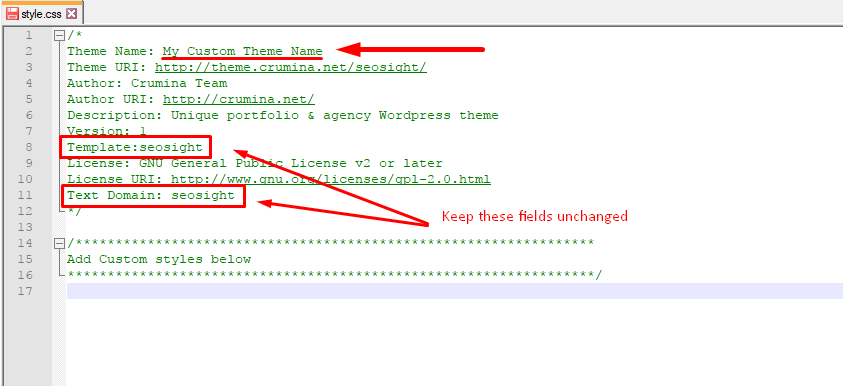
- Open the style.css file of the child theme and rename all fields you need, except the “Template” and “Text Domain” fields. They are synchronized with the parent theme and must remain unchanged for you could get automated updates.
- You can also replace the default image with a custom one. It must be uploaded to the root folder of the child theme with the same name as the default image “screenshot.png”. Example: ../wp-content/themes/seosight-child/screenshot.png

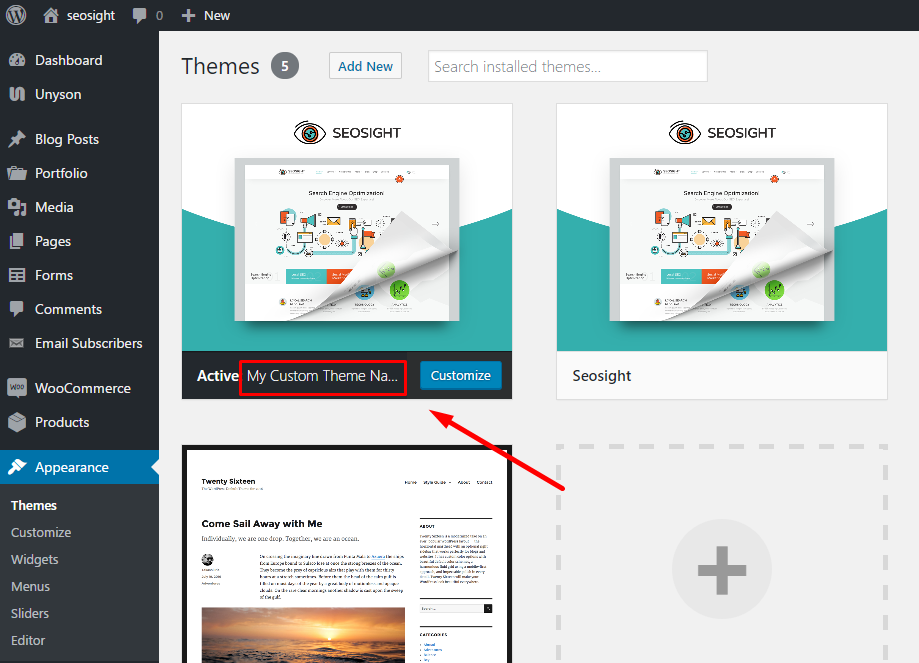
That’s all! Now your theme is renamed. You can make any code modification in the child theme without touching the original code. You can update the parent theme without worrying about your changes. And the most important thing is the automated update function is still available for you.
Conclusion
As you can see the child themes bring a lot of advantages to your website. It doesn`t change your website appearance but allows you to make modifications without fear to lose all settings and content. It is very flexible. Thus, it definitely saves you money and time. Come and try child theme right now as the experienced WordPress theme developer does.